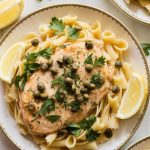
Crockpot Chicken Drumsticks are one of those easy meals that always turn out great. The chicken becomes juicy, tender, and packed with flavor while the slow cooker does most of the work. This is a simple recipe with everyday ingredients, making it perfect for busy days when you want a hearty homemade dinner without spending hours in the kitchen.
Servings: 6
Prep Time: 10 minutes
Cook Time: 4-5 hours on High or 6-7 hours on Low
Total Time: About 5 hours 10 minutes

Why I Love This Recipe
I started making these crockpot chicken drumsticks on busy weekdays when I needed something simple but filling. The first time I made them, I was surprised by how much flavor came from just a handful of pantry ingredients. The slow cooker does all the hard work, and the chicken comes out tender every single time.
What I love most is that the ingredients are affordable, the prep is quick, and the leftovers taste just as good the next day. It’s one of those recipes that feels like comfort food without requiring much effort.
- Easy prep with only a few minutes of work
- Uses simple pantry ingredients
- Tender, juicy chicken every time
- Great for meal prep
- Budget-friendly
- Works well with many side dishes
- Makes the house smell amazing while it cooks
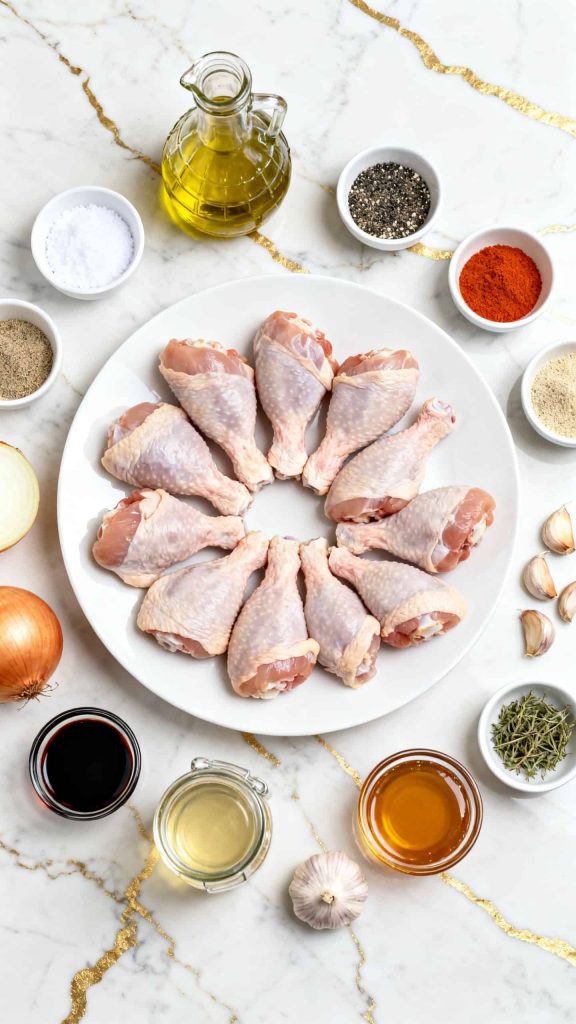
What You’ll Need
- 12 chicken drumsticks (about 4 pounds)
- 1 tablespoon olive oil
- 1 teaspoon salt
- 1 teaspoon black pepper
- 1 teaspoon paprika
- 1 teaspoon garlic powder
- 1 teaspoon onion powder
- 1 onion, sliced
- 4 cloves garlic, minced
- ½ cup chicken broth
- 2 tablespoons soy sauce
- 1 tablespoon honey
- 1 teaspoon dried thyme
Why This Recipe Works (Quick Science)
Slow cooking uses low, steady heat to break down connective tissue in the chicken. As the collagen melts, the meat becomes more tender and juicy.
The soy sauce adds savory flavor, honey balances the seasoning with a touch of sweetness, and the broth keeps everything moist during cooking. The spices soak into the chicken over several hours, creating deep flavor throughout the meat.
Pro Tips
- Pat the drumsticks dry before seasoning so the spices stick better.
- Try to arrange the drumsticks in a single layer as much as possible.
- For extra color, broil the cooked drumsticks for 3-5 minutes before serving.
- Let the chicken rest for 5 minutes after cooking so the juices stay inside.
- Spoon some of the cooking liquid over the chicken before serving for extra flavor.
Tools Required
- Crockpot or slow cooker
- Measuring spoons
- Measuring cup
- Cutting board
- Chef’s knife
- Small mixing bowl
- Tongs
Substitutions and Variations
- Use chicken thighs instead of drumsticks.
- Replace honey with brown sugar or maple syrup.
- Add ½ teaspoon cayenne pepper for heat.
- Use Italian seasoning instead of thyme.
- Add sliced carrots or potatoes to the slow cooker for a complete meal.
Make Ahead Tips
- Mix the seasonings up to 3 days ahead.
- Slice the onion and mince the garlic the day before.
- Season the chicken and refrigerate overnight.
- Store all prepared ingredients separately until ready to cook.
Recipe & Instructions
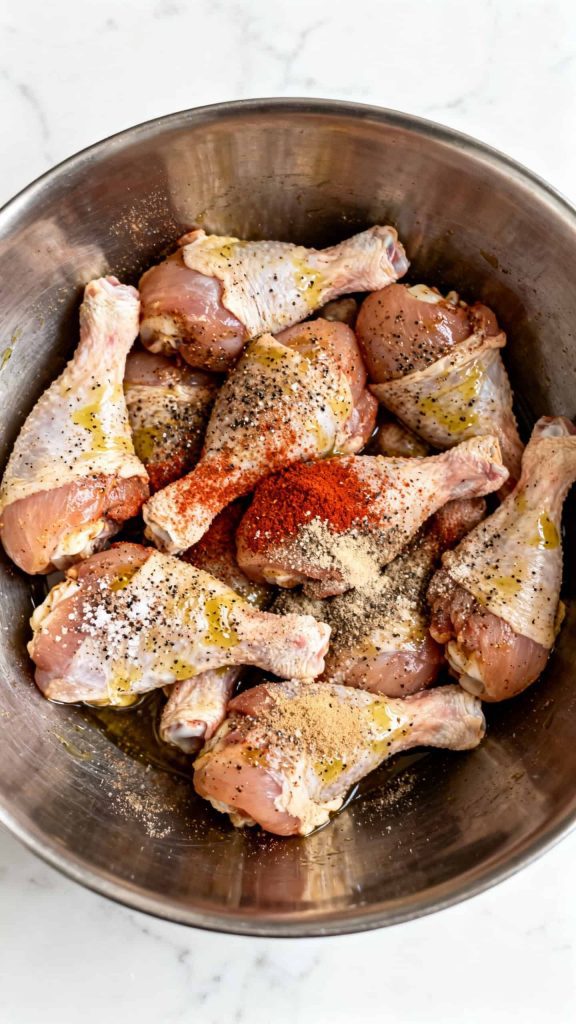
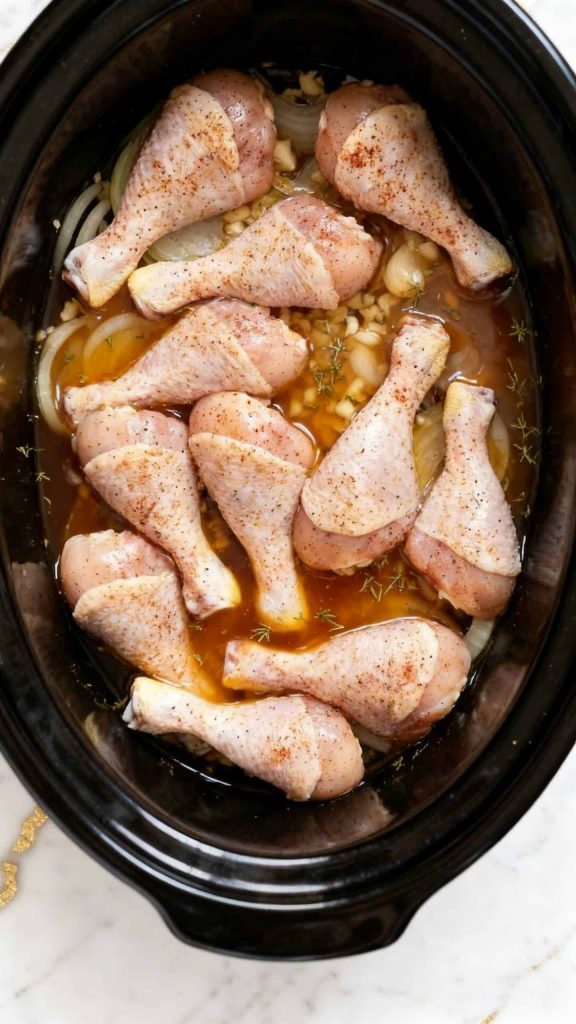
Step 1: Season the Chicken
Place 12 chicken drumsticks in a large bowl. Add 1 tablespoon olive oil, 1 teaspoon salt, 1 teaspoon black pepper, 1 teaspoon paprika, 1 teaspoon garlic powder, and 1 teaspoon onion powder. Toss until every drumstick is evenly coated with the seasonings.
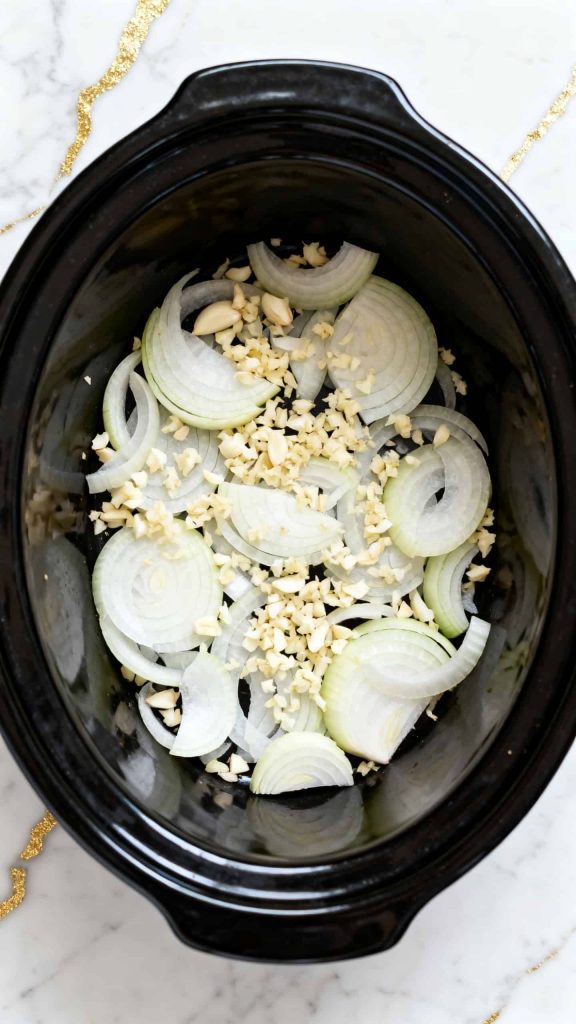
Step 2: Prepare the Crockpot Base
Add 1 sliced onion and 4 minced garlic cloves to the bottom of the slow cooker. Spread them out evenly to create a flavorful base for the chicken.
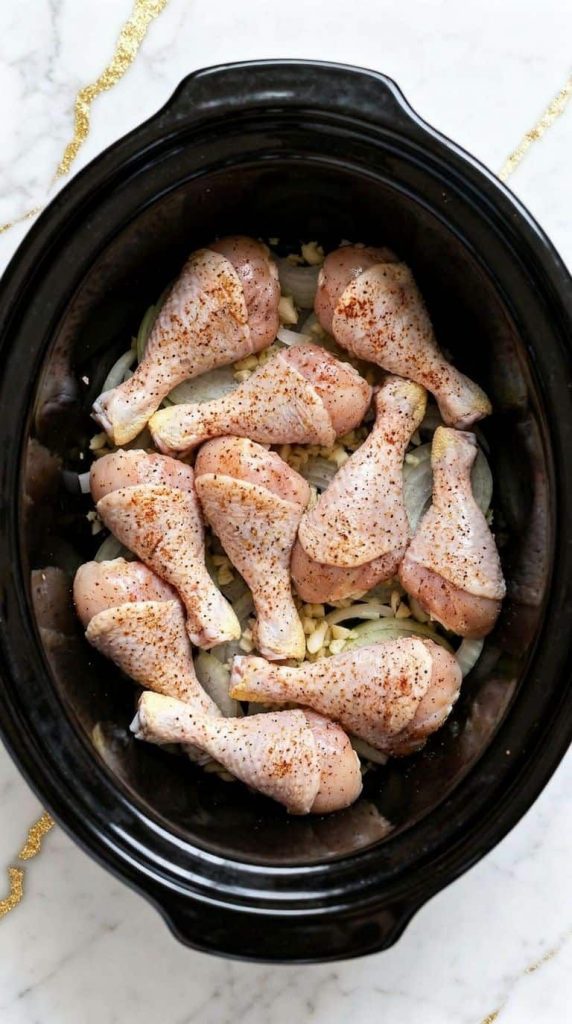
Step 3: Add the Chicken
Place the seasoned chicken drumsticks on top of the sliced onion and minced garlic inside the slow cooker. Arrange them evenly for the best cooking results.
Step 4: Mix the Sauce
In a small bowl, combine ½ cup chicken broth, 2 tablespoons soy sauce, 1 tablespoon honey, and 1 teaspoon dried thyme. Stir until the honey dissolves into the liquid.
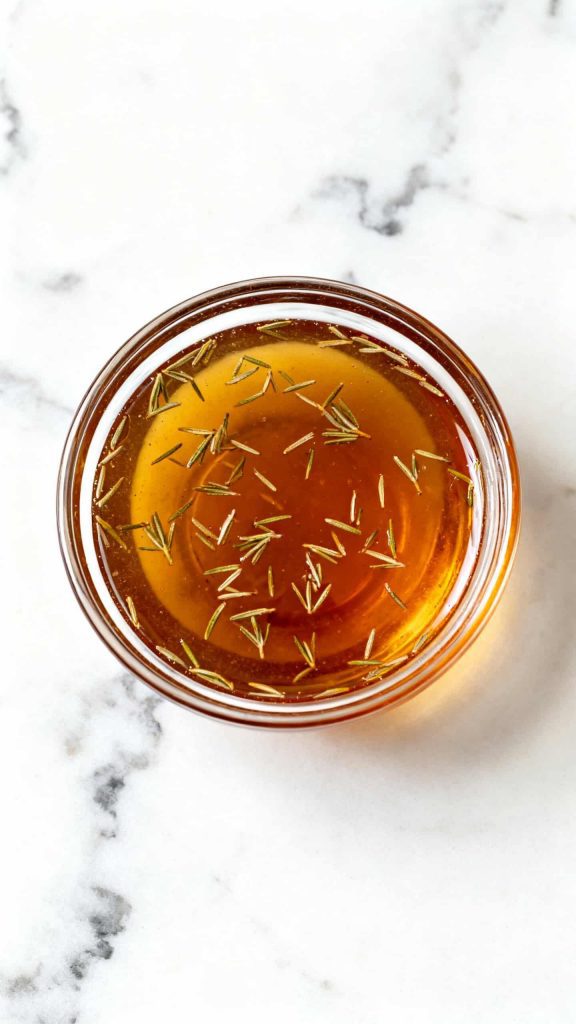
Step 5: Pour Over the Chicken
Pour the prepared sauce over the seasoned chicken drumsticks in the slow cooker, making sure the liquid reaches all parts of the chicken.
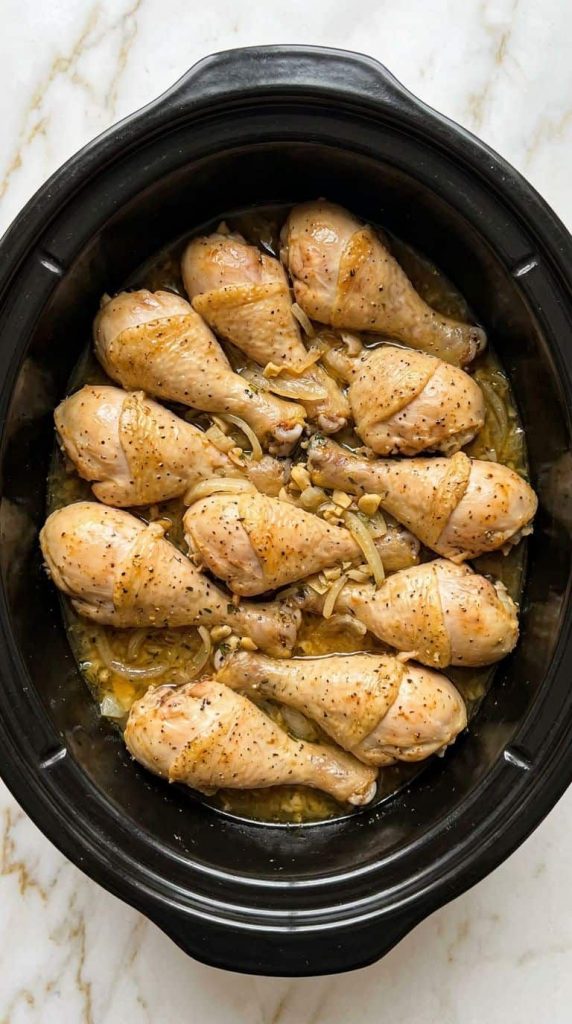
Step 6: Slow Cook
Cover and cook on High for 4-5 hours or Low for 6-7 hours until the chicken reaches an internal temperature of 165°F and becomes tender.
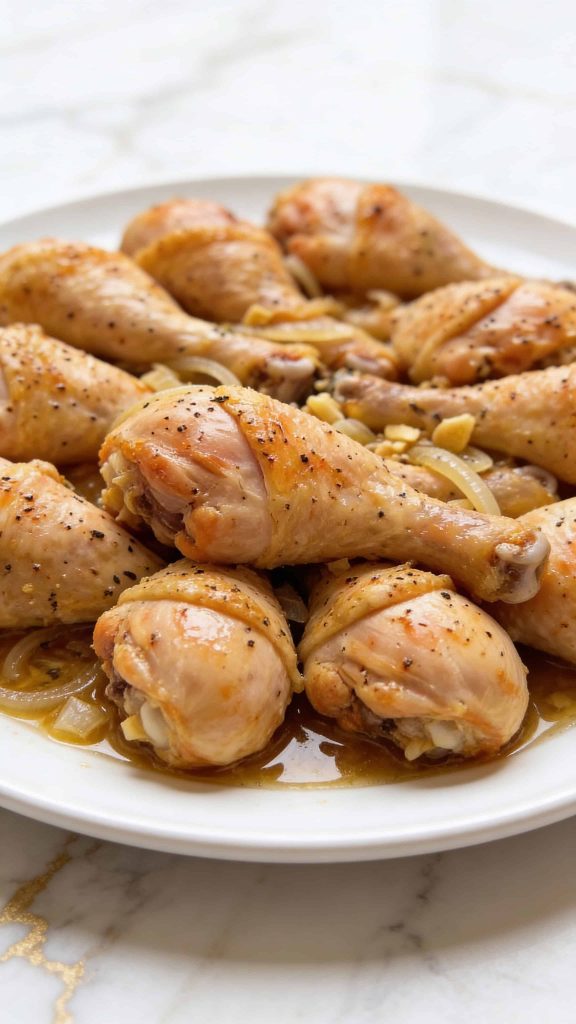
Step 7: Serve
Carefully transfer the cooked chicken drumsticks to a serving plate. Spoon some of the cooking juices and softened onions over the top before serving.
Common Mistakes
- Adding too much liquid. The chicken releases moisture as it cooks.
- Opening the lid too often. This slows cooking and releases heat.
- Under-seasoning the chicken before cooking.
- Overcooking on High for too long, which can make the meat less juicy.
- Skipping the resting time before serving.
What to Serve With
- Mashed potatoes
- Rice
- Buttered noodles
- Roasted vegetables
- Steamed broccoli
- Corn on the cob
- Dinner rolls
- Coleslaw
- Garden salad
Macros Information
Approximate per serving (2 drumsticks):
- Calories: 315
- Protein: 32g
- Carbohydrates: 5g
- Fat: 18g
- Saturated Fat: 5g
- Fiber: 0.5g
- Sugar: 3g
- Sodium: 560mg
Leftovers and Storage
- Store leftovers in an airtight container in the refrigerator for up to 4 days.
- Freeze for up to 3 months.
- Reheat in the microwave, oven, or a covered skillet with a splash of broth.
- Save the cooking juices and use them when reheating to keep the chicken moist.
FAQ
Can I use frozen drumsticks?
For food safety, thaw the drumsticks completely before adding them to the slow cooker.
Can I cook these overnight?
Yes. Use the Low setting and make sure your slow cooker is functioning properly.
Do I need to brown the chicken first?
No. The recipe works well without browning, although browning can add extra flavor.
How do I know when the chicken is done?
The internal temperature should reach 165°F when checked with a meat thermometer.
Can I make this recipe with chicken thighs?
Yes. Bone-in chicken thighs work very well and cook in about the same amount of time.
Conclusion
These Crockpot Chicken Drumsticks are proof that a simple recipe can still deliver big flavor. With just a few ingredients and very little hands-on work, you’ll have a tender, satisfying meal ready for the table. Give this recipe a try, and don’t forget to leave a comment sharing how it turned out and any questions you may have. Happy cooking!

